
Tutorials / Pass results between tasks with an approval
Pass results between tasks with an approval
Verified against Flow 5.0.0-beta.39
On this page
This tutorial builds a workflow of three tasks. A shell task makes a file name from a parameter and returns it as a result, a Manual Approval waits for a person to decide, and a second shell task prints the file name and the decision. It's for workflow authors, takes about 15 minutes, and needs no accounts outside Flow.
Before you start
You need:
- the owner or editor role in a Flow workspace. These roles can also approve; the reader role can't;
- a dispatcher connected to Flow to run the two shell tasks. If you've run the workflow in Getting started, you have one.
What you'll build
| Task name | Task | What it does |
|---|---|---|
build |
Execute Shell | Makes my-app-<version>.tar.gz from the version parameter, and returns it as the result filename |
approve |
Manual Approval | Waits for someone to approve or reject, then records who decided and what they said |
publish |
Execute Shell | Prints filename and the approval's results |
Tasks read values through references, which Flow fills in before the task starts:
$(params.version)reads the workflow parameterversion;$(tasks.build.results.filename)reads the resultfilenamefrom the task namedbuild.
Create the workflow
- In the side nav, select Workflows.
- Select Create a new workflow.
- Leave Start from scratch selected, and enter the Display Name
Publish with approval. Flow fills Name withpublish-with-approval. - Select Create. The editor opens on the Canvas tab, with Start and End.
Add the version parameter
- Select the Parameters tab.
- Select Add parameter.
- Enter the Name
versionand the Label (optional)Version. - Leave Type as Text, and enter
1.0.0as the Default value (optional). - Select Add.
When a run starts, Flow asks for Version, with 1.0.0 filled in. Tasks read the value by the parameter's name, as $(params.version).
Note
Give the parameter a label. The dialog says an empty label shows the name, but in 5.0.0 a parameter without a label appears in Workflow Parameters as an unlabelled field.
Add the build task
-
Select the Canvas tab.
-
In Add a task, search for
shell, and drag Execute Shell onto the canvas. It's in the Utilities category. -
Select the node's edit (pencil) icon. Edit Execute Shell opens.
-
Set Task name to
build. -
Select the Shell Script field. In Update Shell Script, enter the script below, then select Update.
filename="my-app-$(params.version).tar.gz" echo "Built $filename" if [ -d "$RESULTS_PATH" ]; then printf '%s' "$filename" > "$RESULTS_PATH/filename" else printf '{"filename":"%s"}' "$filename" > "$RESULTS_PATH" fi -
Under Result Parameters, enter the Name
filenameand the DescriptionThe file the build made. Add is available once both are filled. Select Add: the result appears below asfilename:The file the build made. -
Select Apply.
Flow replaces $(params.version) before the script runs, so with 1.4.2 the shell sees filename="my-app-1.4.2.tar.gz".
A script returns a result by writing it to the path in the RESULTS_PATH environment variable. Depending on how your operator set up the dispatcher, that path is a directory holding one file per result, or a single file holding a JSON object; the if covers both. Flow keeps only the results the node declares under Result Parameters, so declare every result your script writes. Develop a task has the details.
Add the approval
- In Add a task, clear the search, open Workflow, and drag Manual Approval onto the canvas.
- Select its edit icon. Edit Manual Approval opens.
- Set Task name to
approve. - Leave Approver Group (optional) and Number of Approvals (optional) empty. Any workspace owner or editor can then decide, and one decision completes the task.
- Select Apply.
The Results tab in Edit Manual Approval lists the five results the task records when someone decides. This tutorial uses three:
| Result | Value |
|---|---|
approvalStatus |
approved or rejected |
approvalUserName |
The name of the person who decided |
approvalComments |
Their comment, or empty |
The other two are approvalDate and approvalUserEmail. See Actions for all five.
Add the publish task
-
Drag another Execute Shell onto the canvas. Flow names it Execute Shell 2.
-
Select its edit icon, and set Task name to
publish. -
Select the Shell Script field, enter the script below, then select Update.
echo "Publishing $(tasks.build.results.filename)" echo "Decision: $(tasks.approve.results.approvalStatus) by $(tasks.approve.results.approvalUserName)" echo "Comment: $(tasks.approve.results.approvalComments)" -
Select Apply. This task returns nothing, so leave Result Parameters empty.
Each reference names a task by its Task name, build or approve. If you rename a task later, update the references to it.
Link the tasks and save a version
- Drag from the right port of Start to the left port of
build. Linkbuildtoapprove,approvetopublish, andpublishto End the same way. - Select the condition icon in the middle of the link from
approvetopublish, once. It changes from an arrow (always) to a tick (success):publishnow runs only whenapprovesucceeds, which it does when someone approves. - Select Create new version.
- In Create New Version, enter a Version comment such as
First version, then select Create.
Flow confirms "Successfully created workflow version".

Run it
- Select Workflows in the breadcrumb.
- On the Publish with approval card, select Run it.
- In Workflow Parameters, change Version to
1.4.2, then select Run and View.
The run page opens, and Status shows Running. In the Task log, build shows Succeeded once its container has run, usually within a minute. Then approve shows Waiting, with an Action button. The run waits there until someone decides, and the wait doesn't count towards the run's timeout.
To see the result build returned, select View Details under build. Results lists filename, its description, and the value my-app-1.4.2.tar.gz. Params shows the script as it ran, with $(params.version) already replaced by 1.4.2.
Approve it from Actions
- In the side nav, select Actions. The Approvals tab lists your approval: workflow Publish with approval, task
approve, status Waiting, and 0/1 approvals. - Select the row. Action details opens.
- In Comments (optional), enter
Checked the release notes. - Select Approve.
Flow confirms "Success! Request to approve action submitted".
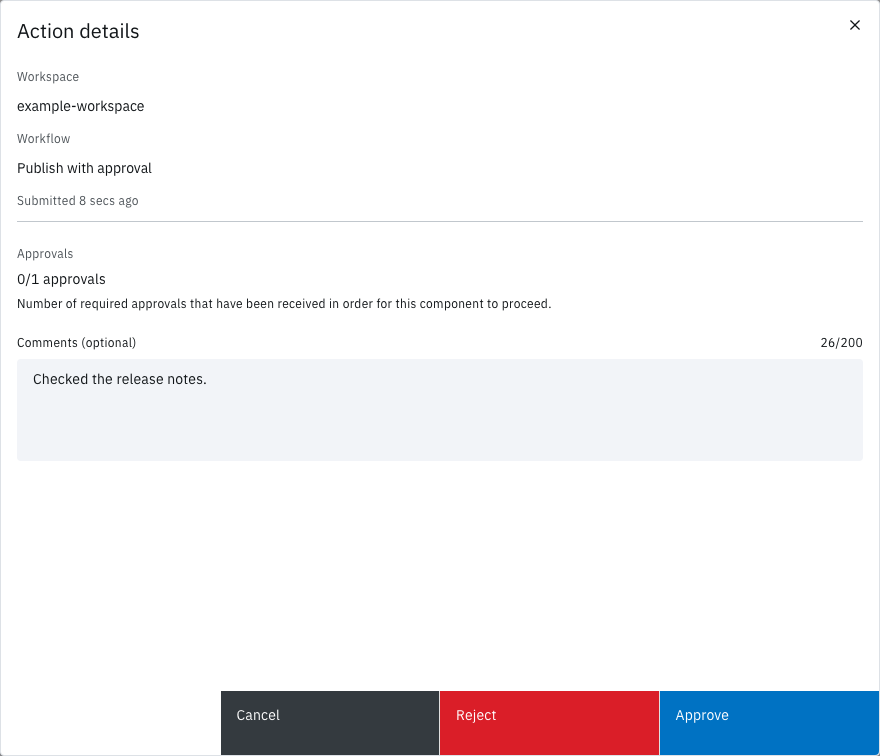
You can decide from the run page instead: select Action on approve, then in Action Manual Approval select Approve, add a comment and select Submit.
Read the output
-
Return to the run: select Activity in the side nav, then the run's row.
-
Wait for
publishand End to show Succeeded. The run's Status then reads Succeeded, with its active time.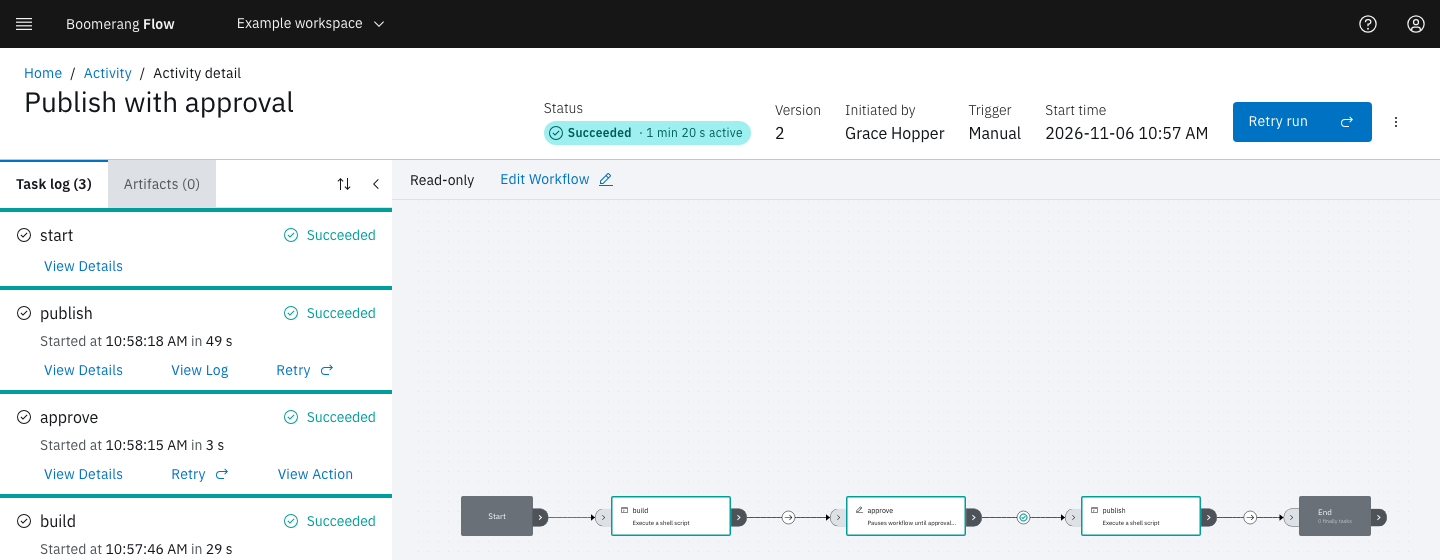
-
Under
publish, select View Log. The Execution Log ends with these lines, with your name in place of Grace Hopper's:Publishing my-app-1.4.2.tar.gz Decision: approved by Grace Hopper Comment: Checked the release notes.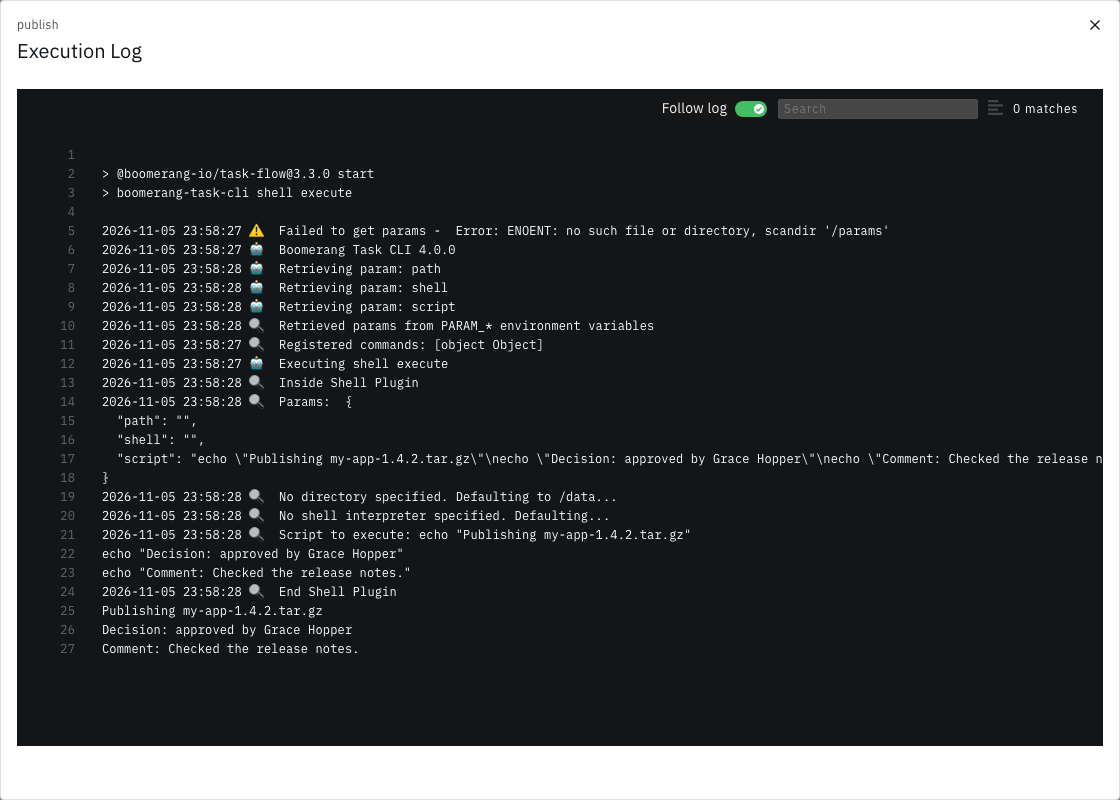
The lines above them come from the task's runner. Its warning Failed to get params is expected: the next lines show it read the parameters from environment variables instead.
publish read filename from build, which ran before the approval, and three results from approve. A result stays readable by every later task in the run, however long the run waited in between. To see who decided after the fact, select View Action under approve.
You've built a workflow that passes a parameter into a task, a result from one task to another, and a person's decision to the task after it.
Variation: what happens on Reject
A rejection ends approve Failed. It still records its results, with approvalStatus set to rejected. The link from approve to publish decides what happens next.
Link from approve to publish |
After Approve | After Reject |
|---|---|---|
| Success (tick), as built above | publish runs. The run ends Succeeded. |
publish shows Skipped. The run ends Failed. |
| Always (arrow) | publish runs. The run ends Succeeded. |
publish runs and prints Decision: rejected by Grace Hopper. The run ends Succeeded. |
To see the first case, run the workflow again, and in Action details select Reject instead of Approve. The run's Status reads Failed, because approve failed and the only path on from it needed a success. End still shows Succeeded in the task log.
To see the second:
- In the editor's Canvas tab, select the condition icon on the link from
approvetopublishtwice. Each select moves it on, from success to failure, then to always: the icon is an arrow again. - Create a new version, run the workflow, and reject it.
This time publish runs and its log prints Decision: rejected by and your name. The run ends Succeeded, though approve shows Failed in the task log: an always link carries on past a failure, so the run reached its end.
Use a success link when the next task should happen only on approval, such as a release. Use an always link when the next task reports the outcome either way, and read approvalStatus in it to tell the two apart. A failure link runs the next task only on a rejection, for example to tell someone their request was turned down.
Not seeing what you expected?
- Why does
buildstay Ready? - Why did
publishfail withParamUnresolved? - Why does the run stay Waiting?
Next steps
- Parameters: every reference form a task can read, and which value wins.
- Actions: approver groups, more than one approval, and every place to decide.
- Runs: statuses, retries and timeouts.
- Develop a task: return results from a container of your own.
- Use an approval's results: email the decision with SendGrid.