
Introduction / Getting started
Getting started
Verified against Flow 5.0.0-beta.39
On this page
This page takes you from your first sign-in to a workflow that has run successfully. You create a workspace, build a workflow with one task, save it, run it and watch the run in Activity. It's for workflow authors, and takes about ten minutes.
Before you start
You need:
- A Flow install you can sign in to. If you run Flow yourself, see Installing and Sign-in.
- A dispatcher connected to Flow. A dispatcher runs each task's container. Your operator sets one up with the install.
- Permission to create a workspace. Any signed-in user can, unless an admin has turned off Workspace creation by users. Otherwise, ask a workspace owner to add you to their workspace and skip to Create a workflow.
If you're new to Flow, read Flow in five minutes first: it explains the workspaces, workflows, tasks and runs this page uses.
Sign in
Open Flow's address in a recent version of Chrome, Firefox, Safari or Edge.
- If Flow shows You're not signed in, select Sign in and sign in with your organisation's account.
- Some installs sign you in before Flow opens, and you go straight to Home.
- If Flow shows G’day! Let’s activate Boomerang Flow, nobody has activated this install yet. The operator who installed it has the activation code: see Sign-in.
Flow opens on Home.
Follow Get started on Home
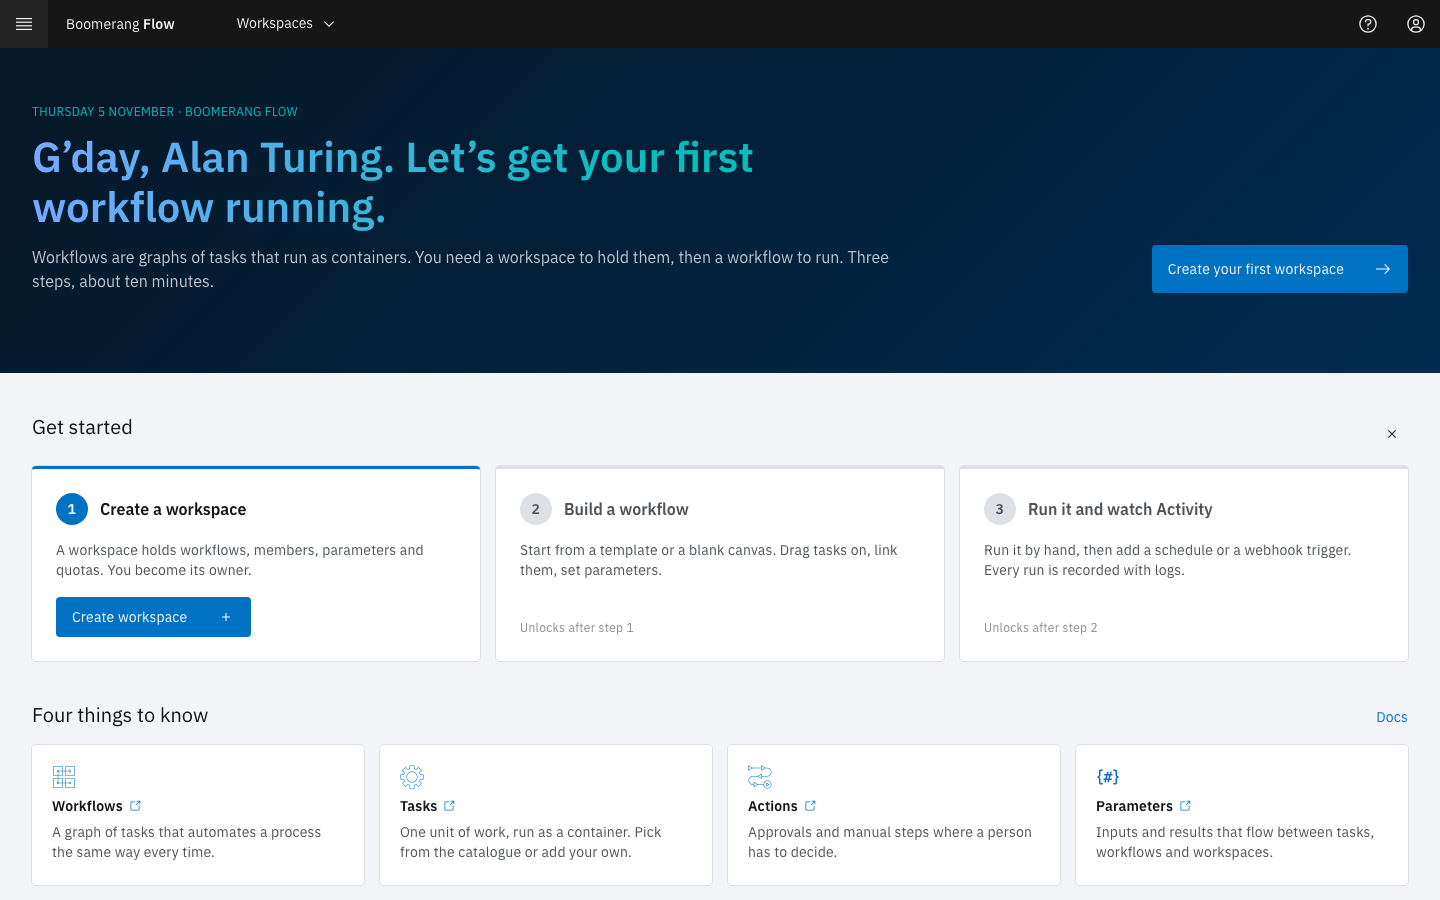
Until you have a workspace, Home greets you with G’day, {your name}. Let’s get your first workflow running. Until you have a workspace, a workflow and a run, it also shows Get started: three steps that unlock in turn.
- Create a workspace
- Build a workflow
- Run it and watch Activity
The sections below follow the same steps. A finished step shows Done. To hide the list, select the close icon beside Get started.
The side nav's workspace items, such as Workflows and Activity, are greyed out on Home. They work once you open a workspace.
Note
On a new install, the person who activates it becomes the admin and the owner of the System and Administration workspace, which comes with three starter workflows. So they see Welcome back instead, with steps 1 and 2 of Get started already Done. To follow this page with a workspace of your own, select New workspace at the top of Home, then continue from step 2 below.
Create a workspace
A workspace holds workflows, members, parameters and quotas. You become the owner of the workspace you create.
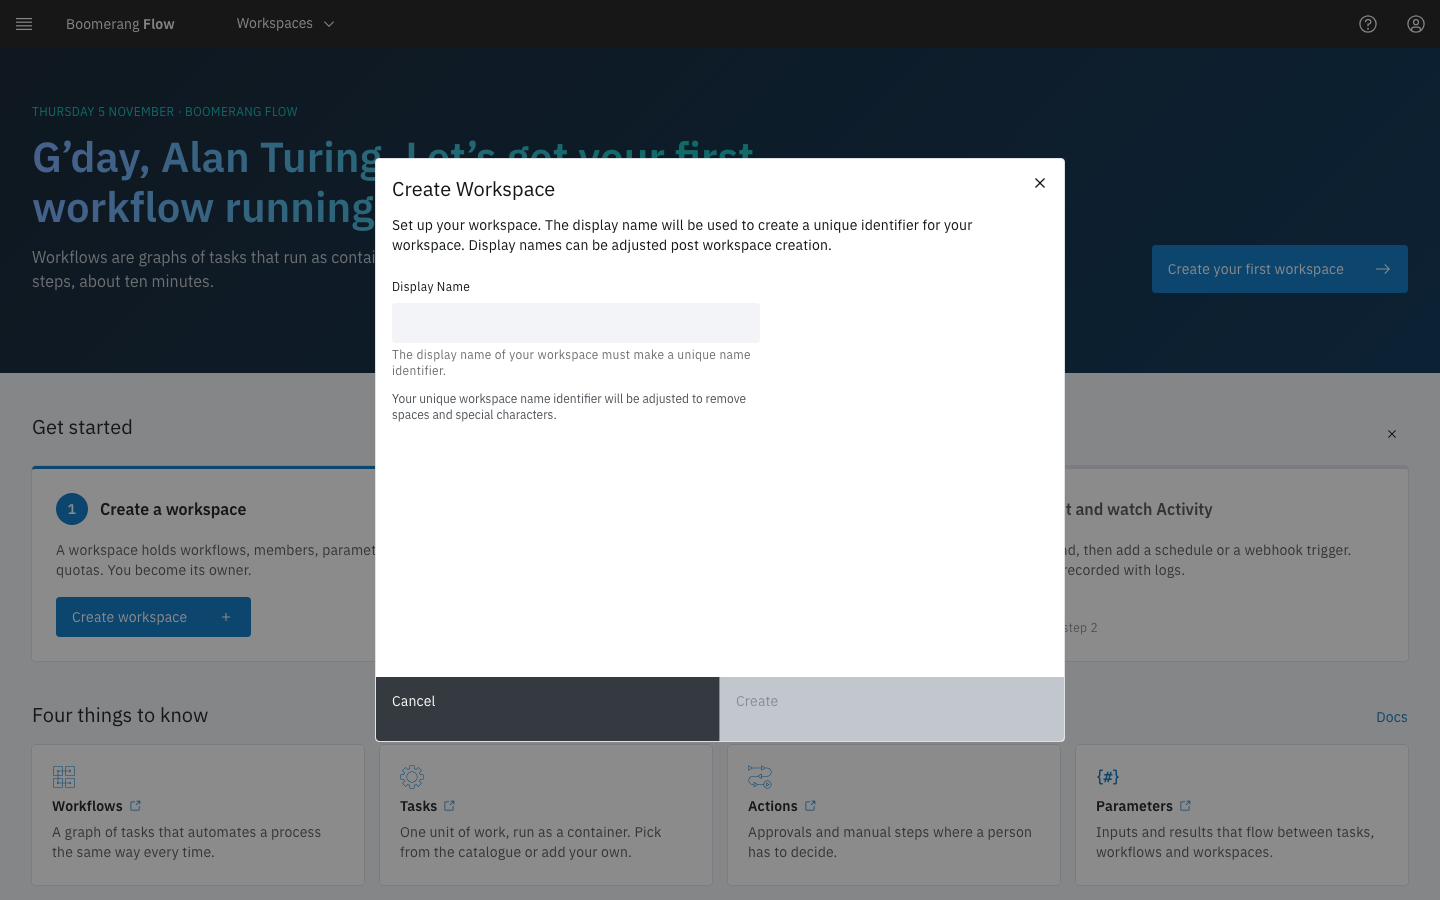
- In step 1 of Get started, select Create workspace. (Create your first workspace, at the top of Home, opens the same dialog.)
- In Create Workspace, enter a Display Name, such as
Getting started. Flow shows the unique identifier it makes from the name, with spaces and special characters removed. - Select Create.
Flow confirms "Workspace created successfully", and step 1 shows Done.
If Home has no Create workspace button and says "Workflows live in workspaces, and you are not in one yet. Ask an administrator to add you to a workspace.", you can't create one. Ask a workspace owner or an admin to add you.
Create a workflow
- In step 2 of Get started, select Go to workflows. The workspace's Workflows page opens.
- Select the Create a new workflow tile.
- Leave Start from scratch selected, and enter a Display Name, such as
Hello Flow. Flow fills Name, the workflow's identifier in the workspace, withhello-flow. - Optionally, add a Description (optional) and choose an icon under Pick an icon (any icon).
- Select Create.
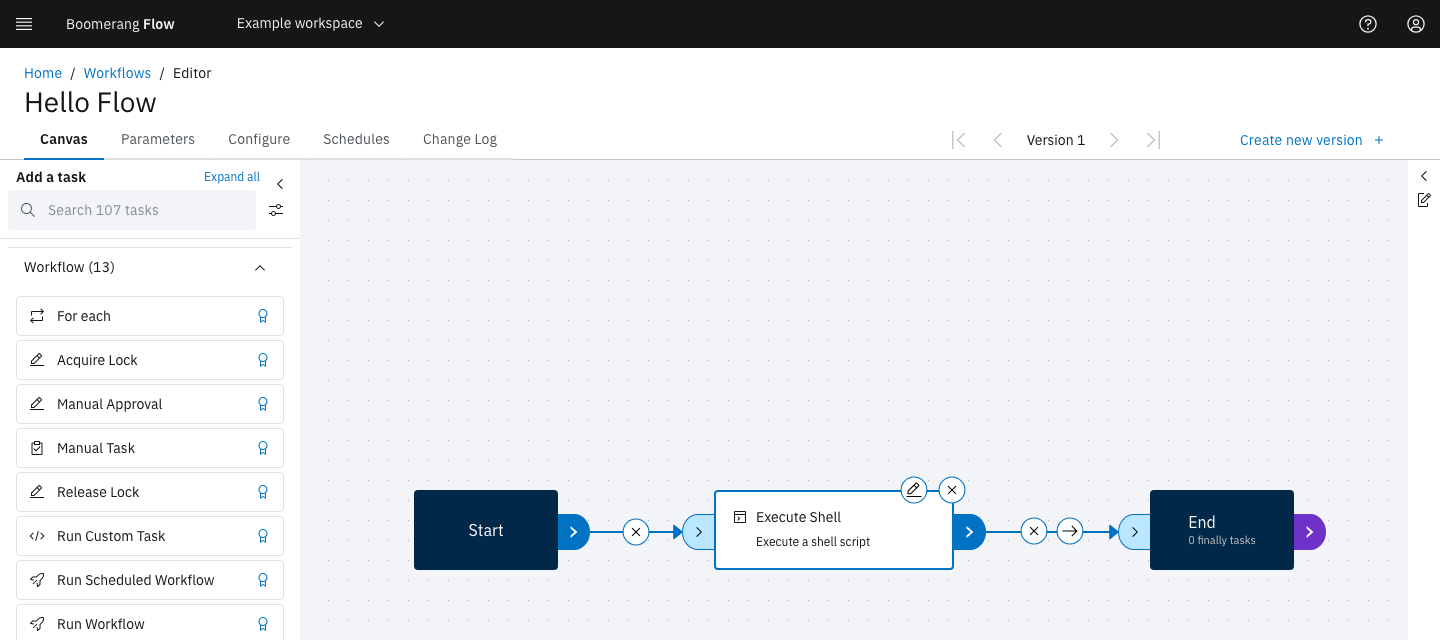
The workflow editor opens on its Canvas tab, with two nodes: Start and End.
Note
Home also lists ready-made starters under Start a workflow. Two of them use the HTTP Call tasks, which don't work in 5.0.0. See Known issues. This page starts from scratch.
Add a task
The panel on the left of the canvas, Add a task, lists the task catalogue by category.
-
In the panel's search box, type
shell. -
Drag Execute Shell onto the canvas. It's in the Utilities category.
-
Link the nodes: drag from Start's right port to the left port of the Execute Shell node, then from that node's right port to End. Links set the order tasks run in.
-
Select the node's edit (pencil) icon. Edit Execute Shell opens.
-
Select the Shell Script field. In Update Shell Script, enter:
echo "Hello from Boomerang Flow" -
Select Update, then Apply.
Leave Directory Path and Shell Interpreter blank.
Save a version
The canvas keeps your changes in the page until you save them as a new version of the workflow.
- Select Create new version, to the right of the editor's tabs.
- In Create New Version, enter a Version comment, such as
Add a shell task. A comment is required, up to 128 characters. - Select Create.
Flow confirms "Successfully created workflow version". If you leave the editor before saving, your browser asks you to confirm, because unsaved changes are lost.
Run it
The editor has no Run button: you run a workflow from the Workflows page.
- Select Workflows in the breadcrumb.
- On your workflow's card, select Run it.
- In Execute workflow, select Run and View.
The run page opens. Run would start the run and keep you on the Workflows page instead. A workflow with parameters opens Workflow Parameters first, for you to enter their values.
Watch it in Activity
On the run page:
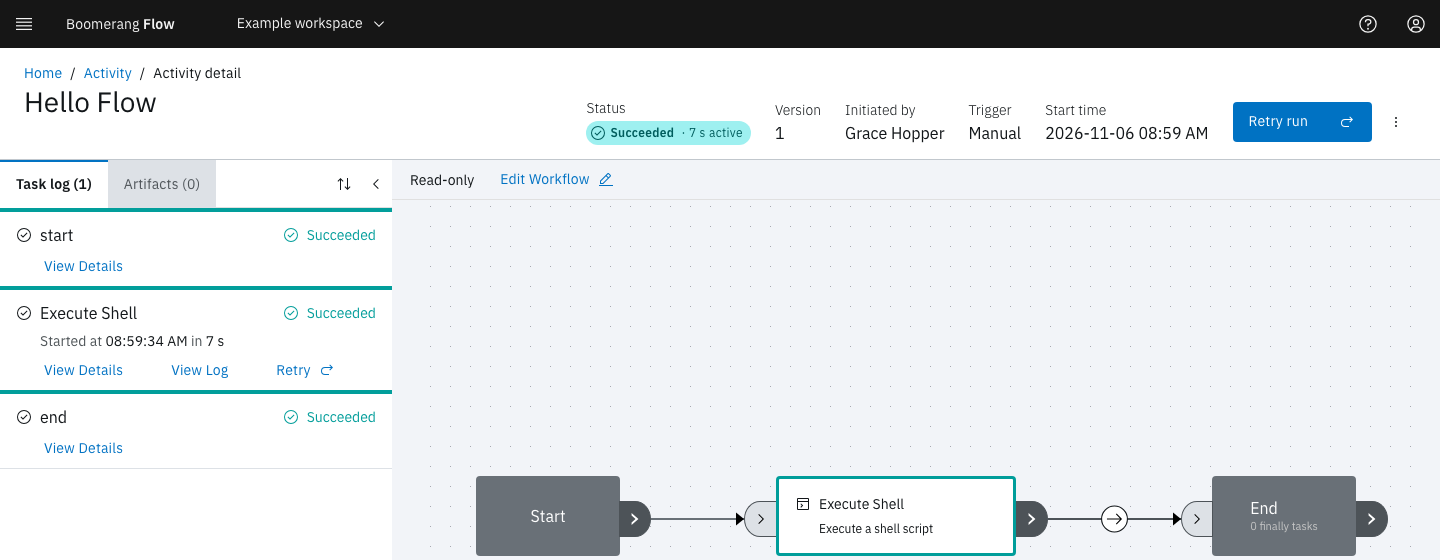
- Status shows Running, then Succeeded, followed by the run's active time.
- The Task log tab lists each task with its status. Under Execute Shell, select View Log. The Execution Log includes the line
Hello from Boomerang Flow. - Selecting a node on the diagram scrolls the task log to that task.
To see every run in the workspace, select Activity in the side nav. Your run is listed with its trigger, Manual, and the status Succeeded. Select the row to open the run again.
Back on Home, Get started has gone, because all three steps are done, and Recent activity lists your run. You've built and run your first workflow.
If the run doesn't succeed
| What you see | Cause | What to do |
|---|---|---|
| Execute Shell stays Ready | No dispatcher has claimed the task. | Ask your operator to check that a dispatcher is connected. |
| Execute Shell is Failed | The script exited with an error. | Select View Details: the Message includes the container's exit code and the end of its log. Fix the script, create a new version and run again. |
| The run is Timed Out | The run took longer than its timeout, 30 minutes by default. | Set Timeout under Configure › Run Options, up to your workspace's quota. |
| Run it is disabled | The workspace has reached a run quota, or the workflow's Manual trigger is off. | Hover over the card's status icon for the reason. See Run a workflow. |
Next steps
- Workflow editor: configure tasks, branch with a switch, and add parameters.
- Parameters: pass values into a run and between tasks.
- Actions: put a person in the loop with an approval.
- Triggers and Schedules: start runs without selecting Run it.
- Runs: statuses, pausing, retries and timeouts.
- Known issues: what doesn't work yet in 5.0.0.