Installing
On this page
Self Hosting
This section provides guidiance on installing the open source Boomerang Flow application on your own Kubernetes® cluster. The installation is done via Helm® 3, and the prerequisites are documented below.
Pre-requisites
You are expected to have one of the supported Kubernetes® platforms available with the additional software requirements presented in the following sections.
Ensure you have read and can meet all the dependencies listed in the Application Architecture.
Helm 3
Ensure you have Helm® 3 installed, as Boomerang Flow is packaged with Helm.
Kubernetes
Ensure you have read and can meet all the dependencies listed in the Infrastructure Architecture.
If you are installing locally, we recommend using OrbStack or Kind to create a local Kubernetes cluster.
MongoDB
MongoDB® is a mandatory dependency that needs to be installed prior. We highly recommend using a managed serivce from MongoDB, Azure CosmosDB API for MongoDB, or the MongoDB Helm chart from Bitnami.
We recommend that you install and create the Persistent Volume Claim (PVC) with retain, with a minimum recommended storage of 2Gi.
Single Instance Bitnami Installation
Note: view the additional values available to be set via the Bitnami chart installation instructions
helm repo add bitnami https://charts.bitnami.com/bitnami
helm repo update
helm upgrade --install mongodb -n flow bitnami/mongodb --set auth.databases={boomerang} --set auth.usernames={boomerang} --set readinessProbe.timeoutSeconds=20Tekton
Tekton® installation steps can be found here.
kubectl apply --filename https://storage.googleapis.com/tekton-releases/pipeline/latest/release.yamlCert Manager [Optional]
We recommend installing / using Cert Manager to generate your TLS certificates.
Installation steps
Install, or upgrade, into a Kubernetes® cluster via Helm, using the following commands:
We've bundled in our Helm chart Boomerang Flow and auth2-proxy. We left them enabled for an easier installation experience however they would need to get configured for your specific use-case.
Note: To disable oauth2-proxy use:
--set auth2proxy.enabled=false.
Explicit examples of the configuration files can be found here.
helm repo add boomerang-io https://raw.githubusercontent.com/boomerang-io/charts/index
helm repo update
helm upgrade --install --debug flow boomerang-io/bmrg-flow -f <configuration.yaml>Note: If
workers.security.enableis set totrue,workers.security.policyshould be set to a privileged PodSecurityPolicy (Kubernetes based platforms) / SecurityContextConstraint (OpenShift based platforms).
Post installation
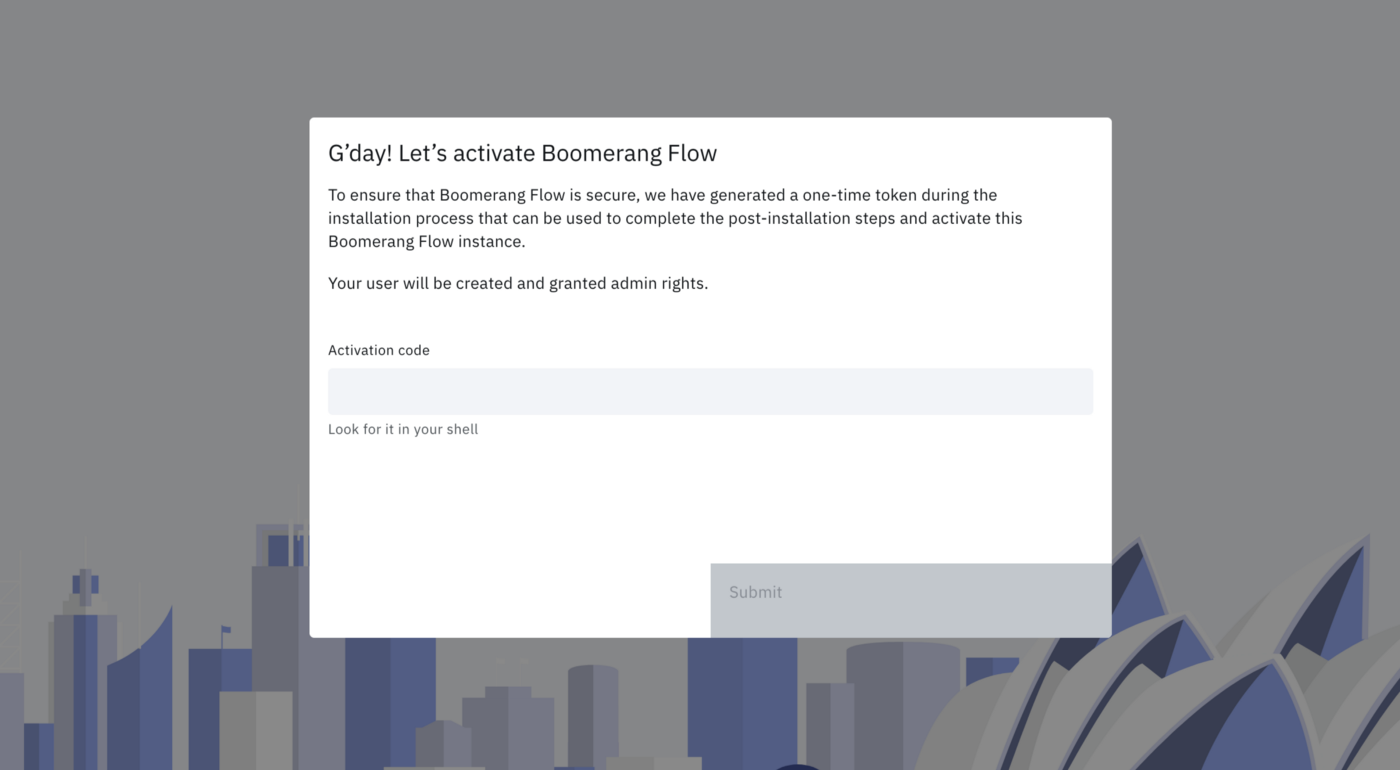
First Time Activation wizard
When installing Boomerang Flow in standalone mode, you will be presented with a token in the output of the Helm command, with some instructions on how to navigate to the installed running application.
Upon navigating to the links provided, a First Time Activation wizard appears, and redirection will occur, until the one-time activation token is provided.
This is an important step to ensure that an Administrator account is dynamically created, providing the user the correct entitlements to perform the post installation configuration steps.
Post installation configuration
After installation and activation, you will be able to administer the settings. These are dynamic configurations that can be changed during runtime. This ensures don't have to provide this via the values YAML at installation time, as there is nothing worse than having to put together a values YAML with greater than 100 values!
Currently, these settings will affect how the workers interface and execute. See Workers and Execute for details.
Installation steps on your local machine
The Helm® 3 chart that we put in place for Boomerang Flow, allows you to install it, together with its dependencies on your laptop. The only pre-requirement is to have Docker installed before starting the installation process.
You can follow this step-by-step article on how to install Boomerang Flow locally on a “regular” laptop which covers:
- installing a Kubernetes cluster on the local machine using Kind,
- installing a mongodb instance to store our data,
- installing Boomerang Flow and its dependencies,
- finally activating it and doing a demo workflow.
Put Boomerang Flow onto your laptop
Issues Installing
If you encounter issues installing Boomerang Flow you can reach out on our Slack channels. The following are some of the known issues faced.
No Pipelines ServiceAccount
If you are attempting to run Workflows and they are coming up with an error including serviceaccounts "pipeline" not found then its most likely that the pipelines service account needed by Tekton is not found. This can be solved by creating the required serviceaccount and rolebinding. Typically we link to a priviledged clusterrole.
kubectl create serviceaccount pipeline
kubectl create rolebinding pipeline-rolebinding --serviceaccounts <namespace>:pipeline --clusterrole=<clusterrole>