Getting the details of a Manual Approval Task
The following use case describes how you can create a Manual Approval Task and use it's details like: the status, the username, the user's email, the comments, and the date down the Workflow. We will show how to send an email using the information retrieved from the Manual Approval Task.
You will also need access to Boomerang Flow.
Create your flow
First, create the new Workflow by navigating to the Workflows page and clicking Create new Workflow. At the modal, choose to Start from scratch, fill in the details, and select Create.
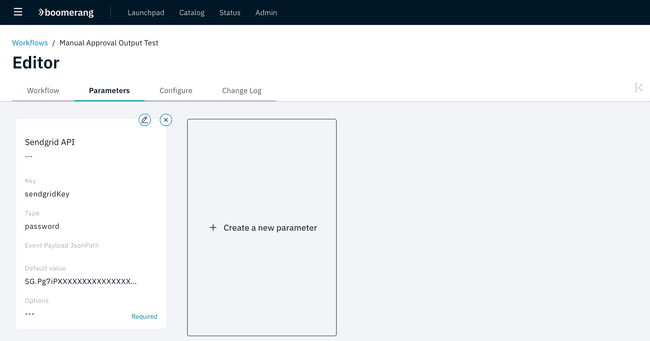
You are taken to the Workflow Editor for this particular Workflow. In the tabbed menu, select the Parameters and define our Required parameter, named sendgridKey - the SendGrid® API Key. Provide the values specific to your case.
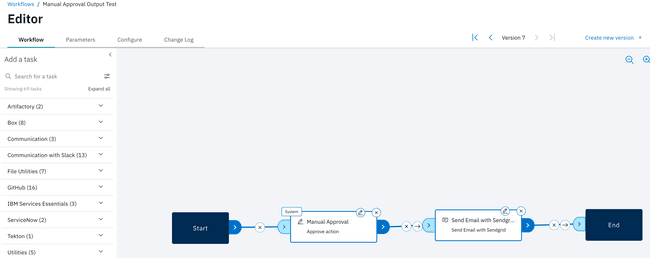
In the left panel of the Workflows tabbed page, expand the Workflow category and drag the Manual Approval Task onto the canvas. After that, expand the Communication category and drag the Send Email with Sendgrid Task onto the canvas. You can chain the Tasks as shown in the following screenshot.
Edit each Task with the following parameters, using the pencil icon at the top of the Task.
For the Manual Approval Task, enter the following specifics.
- Task Name:
Approve action. It is important to have this name since we are going to reference the results of this Task via its name.
For the Send Email with Sendgrid Task, enter the following specifics.
- Task Name: The name of this Task (can be
Send Email with Sendgrid). - API Key: The placeholder for the SendGrid API Key. Use the defined parameter, so the value should be
$(params.sendgridKey). - To: The destination address of the email. Set it to the email address of the person that approved the Task, so the value is
$(Task.Approve action.results.approvalUserEmail). As you can see, use the Task prefix, followed by the Manual Approval Task name, followed by results, and then the specific property of the Manual Approval Task. - From: Similar as the To field. For the scope of this exercise, use the same
$(Task.Approve action.results.approvalUserEmail). - Subject: The email subject that can also hold output values from the Manual Approval Task. Set the email subject to
Test email approval by $(Task.Approve action.results.approvalUserName). - Content Type: Select
Text. - Body Content: The email body. You should show all the information you will receive from the Manual Approval Task, so set its content to
The Manual Approval Task was executed with the following outcomes.

 - status: $(Task.Approve action.results.approvalStatus)
 - date: $(Task.Approve action.results.approvalDate)
 - by username: $(Task.Approve action.results.approvalUserName)
 - by email: $(Task.Approve action.results.approvalUserEmail)
 - comments: $(Task.Approve action.results.approvalComments)
The last step is to save the Workflow. Select Create new version from the top-right corner of the page.
Testing your Flow
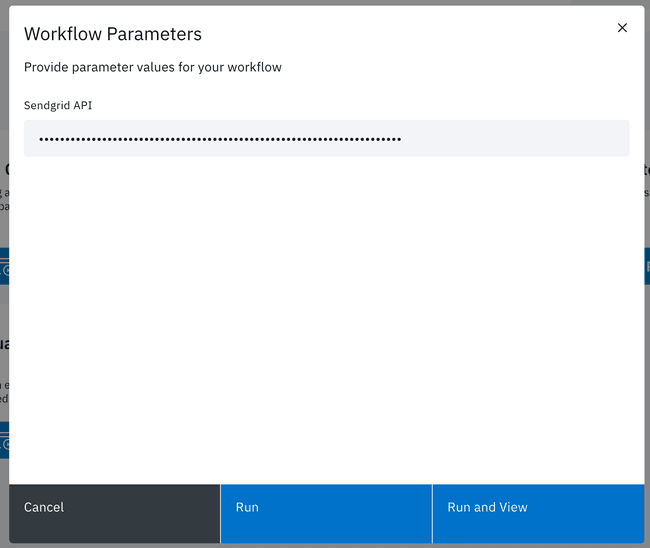
To test the new Workflow, run it manually from the Workflows page. Identify the newly created Workflow and select Run it. In the Workflow Parameters window fill in the parameter values and select Run or Run and View.
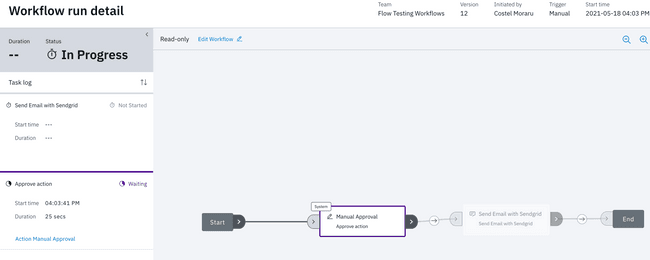
Once the Workflow starts, you will be redirected to the activity details depicting the progress of the execution.
The Workflow execution was suspended waiting for the end user's input. Next, click the Action Manual Approval button in the Approve action Task and then select one of the displayed options. You will notice that the Workflow resumed its execution and once it is finished you can check the email inbox. It should show an email similar with this one.
As seen in the screen shot, the information generation by the Manual Approval Task in the email's content shows that it passed.


